Showing posts with label veggies. Show all posts

Thursday, August 4, 2011

Steamed & fried

We're just coming out of the hottest July on record, which means it was too hot and steamy to do much in the garden, except water. So I welcome August, look forward to the ripening of my 22 heirloom tomatoes, and the other bounty and blooms in my garden.

The beginning of August also means it's time for the monthly SeedGROW post!

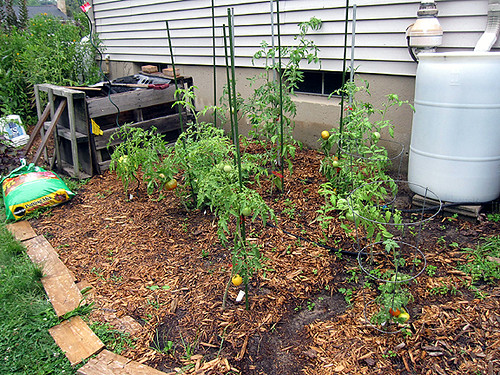
Here's my little veggie bed in the sunniest area of my garden. I dug an edge for this bed and I'm testing three kinds of mulch for a veggie bed: pine straw, leaves, and straw.

Only 12 of my tomatoes are here (the rest are in containers out front), plus two tomatillos, two hot peppers, four basils, and a border of the SeedGROW marigolds 'Summer Splash.' They are all blooming now and the foliage is quite lush.

The basil 'Italian Cameo' is really rocking it out. The soil line is about two inches below the top of the pot, so there is even more foliage than visible in this shot. I really need to make pesto!

The lettuce 'Garden Babies' is a bit bigger than last month, but not yet ready for harvest. On either side are two varieties of Renee's "cut and come again" lettuce mixes, which 've been harvesting for about six weeks and which are still going gangbusters.

On the seed packet, the 'Summer Splash' marigolds all look like this one solid, lemon-yellow flower.

In my bed, though, only one flower looks lemon yellow like that. The rest are a more orange yellow with a darker orange hue. I don't know if they turn lighter as each flower ages, but I actually prefer this multicolored look. (I sowed them all at the same time into the same flat and am positive I didn't mix up seeds.)

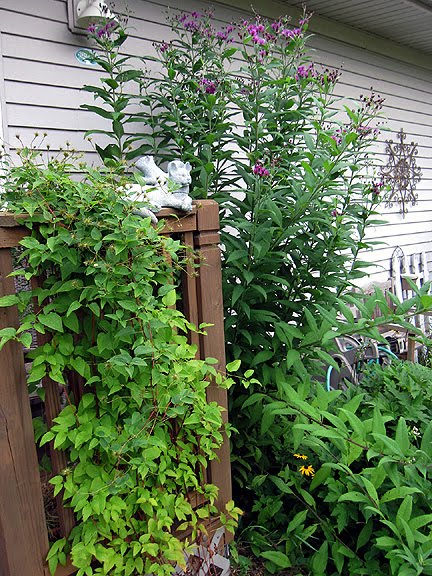
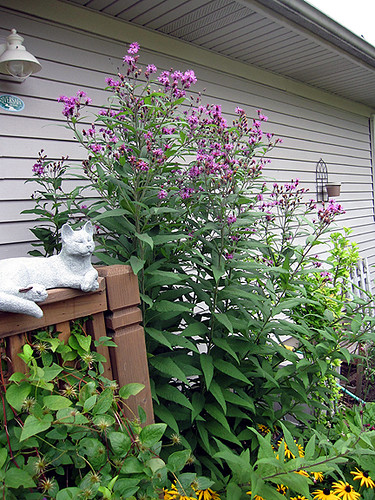
As long as we're still here I want to show you my tall ironweed (Vernonia gigantea aka Vernonia altissima). It is super tall this year (over 7 feet) because of all the rain we had early in the growing season. They're native to my region and I give them no supplemental water.

It can grow in any moisture condition, from dry to wet, and can deal with full sun to part-shade. Mine is in dry clay with morning shade and harsh, west afternoon sun — and look at it! I love this plant.

I'm growing with the SeedGROW project. Thanks to Renee's Garden for the seeds.
placeholder

Monday, August 1, 2011

Growing potatoes in plastic bins

I don't have optimal soil or sun conditions, and a really full garden, so my space for a veggie bed is limited. A few years ago, I started growing vegetables in containers, sneaking them into sunny spots between perennials and shrubs, here and there throughout the garden. I've discovered many vegetables grow well in containers--tomatoes, peppers, zucchini, eggplant, carrots, beets, turnips, squash, and even potatoes. Actually, especially potatoes! Here's how to do it.

First you need potatoes, ideally small ones which are better suited to the confined space of a container.  I select smaller varieties and grow them to maturity (harvesting about a week after the foliage has died back). Another option is to grow full-size potatoes but harvest them early as baby potatoes before they reach full size (about a week or two after flowers form).

Last year I grew 'Bintje' (above). This year I'm growing 'German Butterball,' 'Purple Peruvian,' and 'Red Norland,' all purchased as seed potatoes (the first three from Landreth, the latter from locally-owned Downtown Home and Garden).

Seed potatoes are not actual seeds; they're mature potatoes that we cut up and plant. If you get your seed potatoes a month or so before planting, store them in a cool, dry, dark place at about 50 degrees. (If you're storing potatoes throughout the winter, requirements are different. I'll write about that in fall.)

Some people purposefully wait for their seed potatoes to sprout before planting them. This is called chitting and is achieved by storing the potatoes in a dry place at room temperature a week or two before planting. Chitting shortens the amount of time it takes the potatoes to sprout and mature. Some of my potatoes chitted accidentally because my storage area wasn't cool enough. I found it a bit difficult to handle and cut the potatoes without breaking off some of the sprouts.

Whether or not your eyes have sprouted, cut the seed potatoes into pieces so there are three eyes (or buds) per piece. Note: Dark potatoes like this 'Purple Peruvian' will stain your fingers, but it washes off easily.

You can use any large container, provided you drill drainage holes into the bottom. I use plastic storage bins because they're lightweight and inexpensive. They're on sale now for back to school and will be again after the holidays. I got the one shown here at a big box for $4 after Christmas.

My bin is 18" deep, 18" wide, and 25" long, and I wouldn't go any smaller than that, especially not in depth. I drilled holes (7/32" bit) along the bottom edges and in parallel rows, lengthwise. You do not need the lid. I move mine around the garden as a weed suppressant.:)

For filler, I like a 70/30 combo of compost and a good soil mix. The City of Ann Arbor gives out free compost in spring, so I load up there. You can adjust the ratio for your own needs. Potatoes don't need rich soil, but I think they grow much better in a container with it.

Fill your container about a third with your soil/compost mix. Plant each potato piece so it's sitting about an inch from the bottom of the tub and is covered in the rest of the soil. Plant so a cut edge is facing down and the eyes are facing up. I want to tell you I planted the pieces 6 inches apart, but it was likely more like 3 inches. I varied the planting depth a little, to create more space.

Potatoes like full sun, so if you have it, great! If you don't, don't worry. Potatoes are forgiving. Once my trees leaf out, my bin only gets four to six hours of a sun a day and the potatoes did fine.

Here is the bin with the potato pieces planted. This year, I also planted in a potato sack, which my mother wasn't using. The instructions are the same, except you don't need to drill holes because the material is porous, and not as many potatoes fit into it. Otherwise, results were the same.

In-ground potatoes can be planted when soil temperatures reach 45F. I plant mine in the bins at the end of April here is southeastern Michigan, where the last frost date is mid-May.

I water my potatoes once a day, like I would any container. Don't worry if your potatoes don't grow evenly at first. The shorter foliage will catch up in a few weeks.

The heights have evened out now at about 8 inches tall. At this stage, you want to add more soil into the bin, which is the same concept as mounding soil around a plant growing in the ground. Add about 2 inches of soil mix, being careful not to break the stalks.

As the potato stalks grow, keep adding more soil into the bin in stages. This is not an exact science; I add 2 inches each time the foliage gets to be about 8 inches over the soil line. When you've added enough soil to be about 2 inches from the top of the bin, stop filling it. You need at least that amount of clearance so that water has a place to collect without overflowing in heavy rainfalls.

Eventually the potatoes flower (these are 'Peruvian Purple'), bees pollinate, and the potatoes grow.

After about three months, you'll notice that much foliage is still growing, but some has died back. Potatoes are ready to harvest a week or two after the foliage is dried out!

Carefully dig in the areas where foliage has died, leaving the remaining stalks intact. There's nothing I like more than sticking my arm elbow deep in warm earthy compost and rooting around for potatoes. And it's so much easier than digging.

Ta da! My first potato of 2011, a 'Red Norland,' harvested on July 27. They are so good eaten right after harvesting--I ate this one raw, like an apple.

I'm going to do a second planting in the next few days, as soon as I harvest everything currently in the bin. I'm not sure if there's enough time for a second harvest, but I'm going to see what happens. Three months from now will be Halloween. Since potatoes can handle some cold, I'm hoping they will finish by then. I'll let you know.

Another advantage to growing in a bin is you don't have to worry about crop rotation. I dump the compost/soil mix onto my veggie bed at the end of the season, wash the container with a solution of 9 parts water to 1 part bleach, and fill it with fresh soil next year. I can use the same container over and over again, and I save some potatoes to start next year, too.

Saturday, July 2, 2011

Garden Green

I can't believe it's July already, but here we are. And time for another SeedGROW post! A month ago, I had just sowed the basil and lettuce seeds, and the marigold seedlings had just come up.

Today, the basil 'Italian Cameo' is doing really well.

You can almost smell it!

The lettuce 'Garden Babies' is not quite as lush. I'm starting to think I should have planted it in a smaller container, as it's a variety created especially for small spaces.

I do enjoy its round form!

I sowed several other varieties of lettuce on the same day as the 'Garden Babies' into some drawers I got through freecycle. Both seed mixes are also from Renee's Garden, and I've already been harvesting from both. 'Cut and Come Again' (foreground) is a mix of baby and mesclun lettuces, and 'Farmers Market Lettuce Blend' (background) is a mix of sweet green and red lettuces. Both mixes will regrow after being cut.

I've planted the marigolds at the edge of my vegetable bed, because I was struck by an urge to go old school. They haven't flowered yet, probably because I only planted them in the ground a few days ago, and their roots needed to expand from their cell packs! I'm sure I'll have flowers to show you next month.

Have a super holiday weekend, everyone! I'm watching the 2011 FIFA Women's World Cup, which runs through July 17. Go Team USA and Go Team Germany! Deutschland Vor! Noch ein Tor!

I'm growing with the SeedGROW project. Thanks to Renee's Garden for the seeds.

Sunday, August 29, 2010

Amy's Musings: Adventures in Food

It's time for another guest post from my friend and fellow master gardener, Amy Bruhn, who shares her experiences participating in a CSA. All photos copyright Hauk Farms, used with permission.

Ever since reading the book Animal, Vegetable, Miracle by Barbara Kingsolver two years ago, I have been paying more attention to where my food comes from. I am trying to eat fruits and vegetables when they are in season and at their peak flavor, and I try to buy locally where possible to support the local economy and because food tastes a lot better when it hasn’t travelled a thousand miles before arriving at my doorstep.

For the past two years I have bought all of my meat from Creswick Farms, located in Ravenna, Michigan (which is northwest of Grand Rapids). Once a month they go on the road and deliver meat to customers in Waverly, Okemos, Brighton, and Novi. You have to order a week in advance, so I’ve had to adjust my meal planning a bit, but it’s been worth it. Their prices are higher than the supermarket, but it is all organic, free range, and pasture fed, with no antibiotics or hormones. And when you buy from the grocery store you don’t get to know the farmer who raises your food, as well as his wife and kids. I’ve also learned how far removed we’ve become from the natural cycle of food in just two generations. Last year the farmer’s wife thought it was quite humorous that I wanted to buy chicken in the dead of winter. I’m so used to having chicken year-round that I never made the connection that there’s no pasture for those pasture-fed chickens when there’s a foot of snow on the ground. So I’ve been getting quite the education.

This year I decided to take it a step further and join a CSA. Through the Local Harvest web site I found a relatively new CSA, Hauk Farms, located in Canton, which was reasonably priced and also offered half shares for smaller households like mine. Bryan Hauk is a fifth-generation farmer and he is currently farming the farm his great-grandfather established in 1919.

For those of you who aren’t familiar with CSAs, CSA stands for Community Supported Agriculture. With a CSA, a farmer offers a certain number of “shares” in the farm’s crops, with a share typically consisting of a box of seasonal produce each week throughout the farming season. The farmer benefits by getting some cash flow prior to the planting season and customers benefit by getting freshly-picked, locally-grown produce each week and by getting to know the farmer, and farming practices, of the person growing their food. With my work schedule I can’t always get to a farmers market, so this way it’s like having the farmers market come to me. The only difference is that I don’t get to pick and choose what I buy each week. It’s always a complete surprise! (I believe some CSAs allow you to pick from a list or pick your own.)

Every Friday I get a text message from Bryan letting me know that my produce has been dropped off. Fortunately he has a drop-off point in Dearborn, less than a mile from my home. It’s been interesting to see what is in my box each week and figuring out what to do with it. Some things have been easier to deal with than others. The head of cabbage the first week was easy — I made cole slaw. But then when I got two more heads of cabbage the next week, they became hostess gifts.

I have been approaching this as an adventure as I learn firsthand what is available through the season in Michigan. I also decided that I would give foods that I’m unfamiliar a try. Well, except for the eggplant and the jalapenos. When those show up in my crate I will be finding them new homes. (Monica refers to herself in third person and waves her hand frantically.) I’m keeping a list of what I get each week and what I’ve done with it, so next year I’ll be a bit more prepared and will perhaps find new recipes to try before next summer.

So far, other than the cabbage, we have gotten green beans, sweet corn, zucchini, radishes, cucumbers, summer squash, pickling cucumbers, beets, bell peppers, romaine lettuce, sweet peas, and cantaloupe. The green beans and corn are so yummy when you eat them just a few hours after they’ve been picked. I found my grandmother’s blanching pot in my basement, and I found out that freezing green beans is a lot easier than I thought it would be. I also dug out my canning supplies and made bread and butter pickles, dill pickles, and some refrigerator pickles. I will probably be eating pickles all winter long. I’ve never been a zucchini or summer squash fan, so I’ve been making and freezing zucchini bread too. (It was really, really good, thanks!) I wonder how the bread will go with pickles this winter.

Other produce we should be getting this season are broccoli, carrots, cauliflower, eggplant, acorn squash, butternut squash, cherry tomatoes, beefsteak tomatoes, and two varieties of watermelons. I’m a bit worried about the tomatoes because Bryan told me the plants did better than expected and he estimates there will be two hundred pounds of tomatoes for each person. That is a lot of tomatoes! I can’t even begin to comprehend how many tomatoes that will be. I guess I’ll be learning how to make salsa and spaghetti sauce!

I’ll let you know whether I survived the onslaught of tomatoes at the end of the season. In the meantime, here are some pictures for you to enjoy.

The cantaloupes were blossoming in early June and the first ones were harvested the first week of August.

The first planting of sweet corn made it through several frosts, one freeze, and nearly 20” of rain and yet it was still ready for picking in mid July.

Here are some of the radishes from the first planting that survived being under water for some time.

Lots and lots of tomato plants…

The first planting of green beans went through it all: frost, freeze, hail, record rain, and then bugs.

(I'm glad to report that Amy gave me beets, corn, tomatoes, jalapenos, and three kinds of pickles she canned and several loaves of zucchini bread she baked. I'm still holding out for eggplants.)

Sunday, August 15, 2010

August Blooms

I was just thinking it's been a while since we've walked around my garden together and it's even time for the August Garden Bloggers' Bloom Day!

chairPlanter

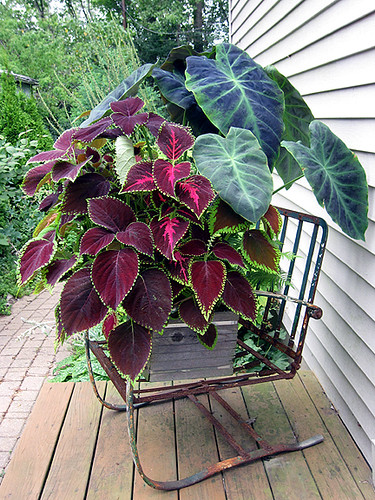
I have to start with this retro green and rusted lawn chair, which I found curbside. I struggled with at least five contortions before fitting it into my non-hatchback Focus. At one point it fell out of the trunk and was dragging on the road (I am not exaggerating)... and it hit my foot on one lift. But I'm stubborn and just knew it would make the perfect plant stand for my pot of elephant ears, ferns, and coleus.

BintjeInTub080110

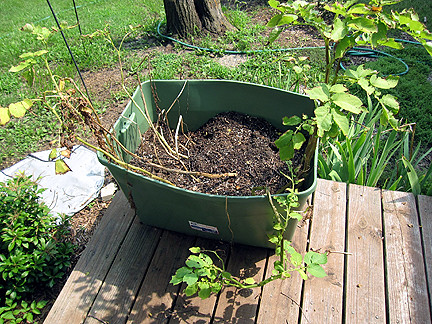
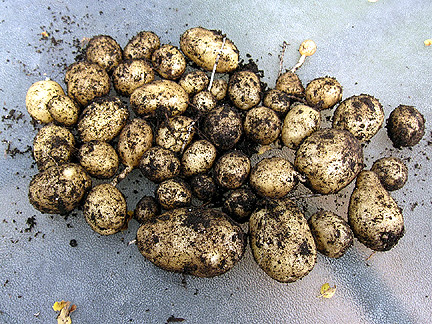
I grew potatoes for the first time this year. I decided to use a storage tub (with holes drilled in the bottom), so I could fill it with composty goodness. You know they're ready to harvest when the foliage dies. I started them from seed potatoes, and they were ridiculously easy to grow and they tasted so good. And digging for the taters was fun — there's just something about sticking your arms elbow deep into a nice soil-compost mix and rooting around... aaaahhh!

BintjeSecondHarvest080110

Here's my second harvest of 'Bintje' potatoes. Nom nom nom!

BlackBeauty081410

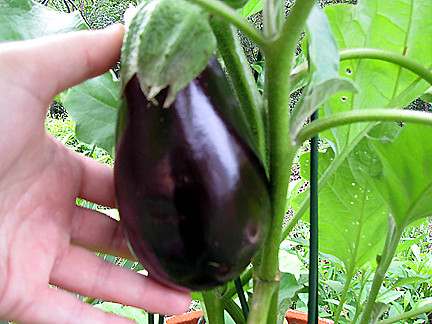
I'd more or less given up getting eggplants this year, when I saw a tiny 2-inch fruit on August 8. Holla! I thought it was solely because, as Lisa put it, they were "abused as a seedling" (I left them in those small cell packs way too long before transplanting), but it turns out several others have reported their eggplants are late this year too (Ha! it's not all my fault!). We had a really heavy rainstorm and on August 14, the eggplant had tripled in size.

tomatoes

Tomatoes are looking a little small compared to everyone else's, but I don't have too much sun and the soil is bad here, despite improvements, so I'm glad to get even a few tomatoes per plant. They're all heirlooms and each plant is a different variety. I have another two tomatoes in the ground out of view, plus five more in containers. I just realized this whole shot, with my home-made compost bin and rain barrels, plus the random stuff I have set around to squelch weeds, makes this an excellent #uglygardens vignette.

I've saved my first tomato seeds of the season. Easy-to-follow tomato seed saving instructions, with photos, are here. This is my second year saving tomato seeds. I first used paper towels to dry the seeds in the final step, but the seeds really stuck to that. I then tried plain white paper and that worked a lot better. This year I found Colleen's instructions and I got some paper plates, which was genius. No sticking at all and much faster drying times.

The other thing I did differently this year was to wait for mold to form in the initial seed soaking. This fermentation step isn't necessary in terms of seed viability or vitality, but it makes the seed coating (gooey tomato gel) come off the seeds much more easily. Last year I skipped that step and rinsed and rinsed and rinsed and rinsed in a sieve. That worked, too, but was a lot more work.

cupPlant081110

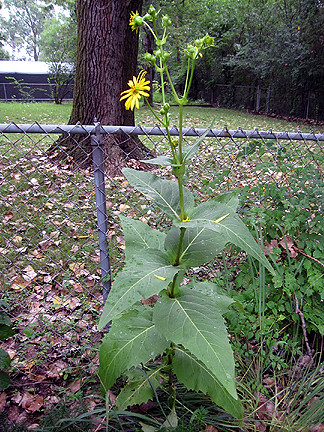
My cup plant (Silphium perfoliatum*) is only 5 feet tall, though they can get to 10 feet in optimal sun. I wrote a bit more about it here.

cupPlantBug2

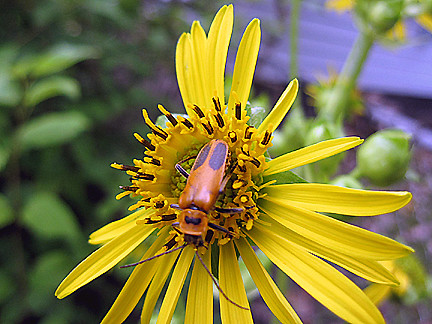
Look who I found on the cup plant blossom — the soldier beetle is not only a pollinator, but it eats aphids. I love beneficial insects. Plus, it's just so cute!

noddingWildOnion

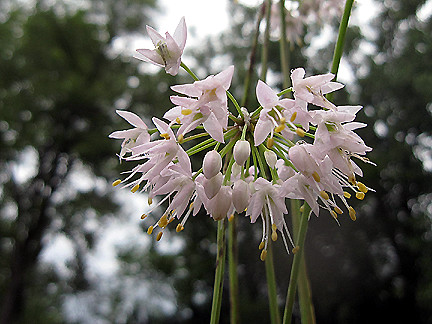
Despite my laziness in not having planted this nodding wild onion (Allium cernuum) since my friend gave it to me in {looks around furtively} early June, it's blooming and doing well!

LiatrisAspera

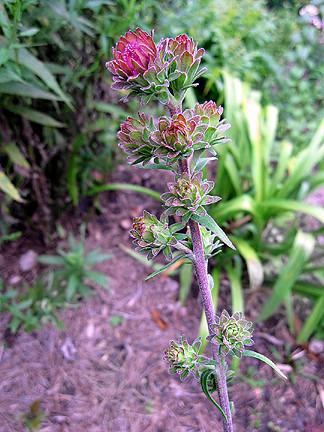
I love the almost-ready-to-bloom buds of rough blazing star, Liatris aspera.

Big Bluestem

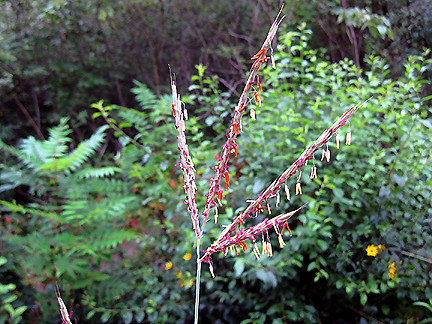
Love the turkey-foot shaped seed head of big bluestem grass, Andropogon gerardii.

tallCoreopsisFence

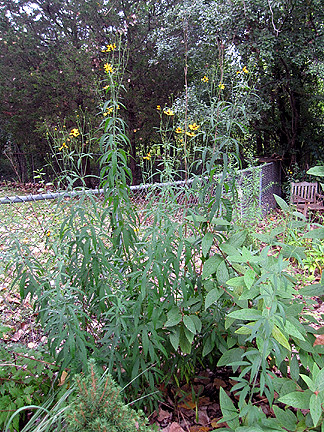
I have several clumps of tall coreopsis (Coreopsis tripteris), this one along the neighbor's fence.

butterflyBush

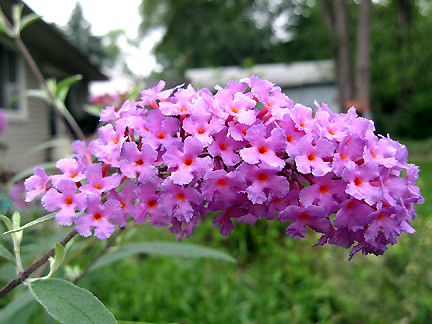
Butterfly bush is bright and cheerful.

ViburnumBerries

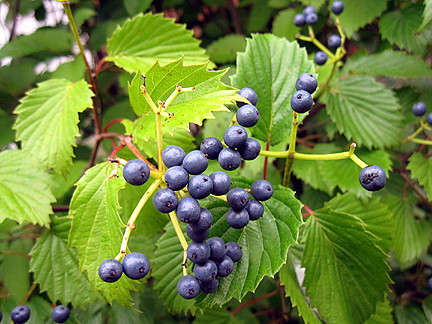
One of my many cultivar Viburnums. I love the berries. I do have a native arrowwood Viburnum, too. :)
AnemoneBuds

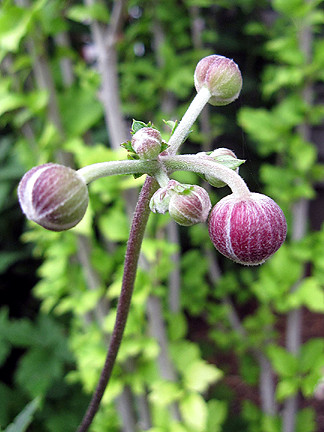
I adore the buds of Japanese anemone. (All together now: "Noogie!")

AnemoneFront

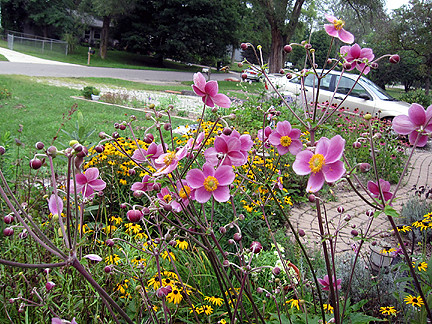
Some of my Japanese anemone have already starting blooming.

beautyberryBerries

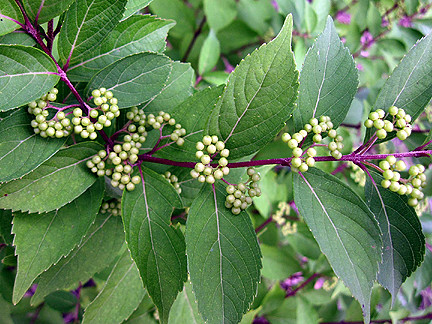
The berries on this purple beautyberry shrub will turn bright, vivid, holla! violet in another month or so.
FrontLookingSouth081410_2

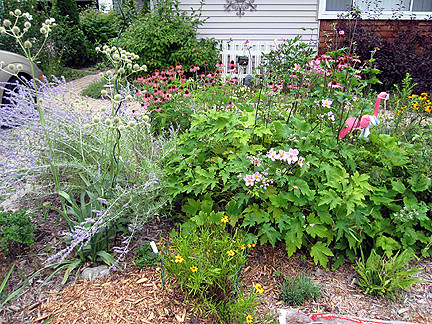
The front bed taken from the driveway, looking south. (Pinky says hi.)
FrontLookingSouth081410

The front bed along the house, taken from the porch facing south.

BiziFront

The front bed on the other side of the walkway, taken from the front porch looking west. (Say hi to Bizi** so she can ignore you!)

front

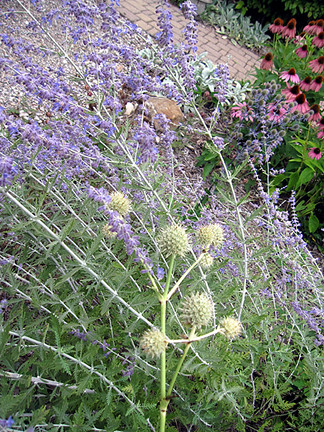
One of my favorite garden spots. I love the rattlesnake master (Eryngium yuccifolium) paired with the Russian sage.

RmasterRsage

And that combo close up.

MexicanHat
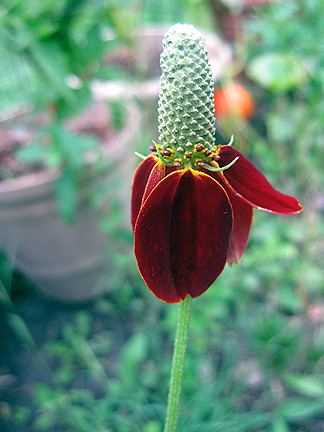
Mexican hat.

sunflowers081410

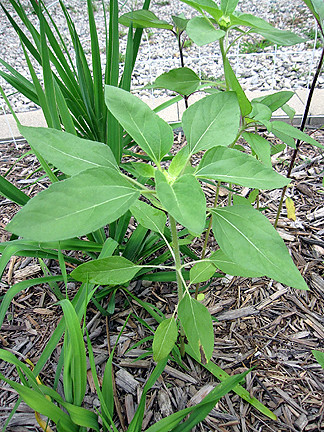
The sunflowers I sowed on July 4 are about a foot tall and look like they're getting buds!

MexicanPetunia

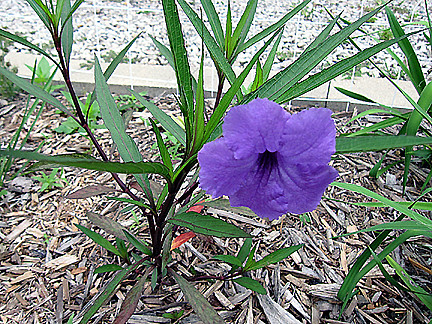
The Mexican petunia Sweetbay sent back in May finally has a bloom!!

RosaGoldenWings

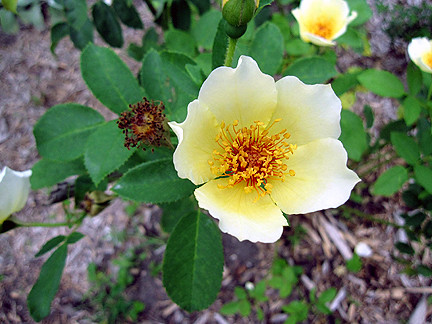
My first-ever rose 'Golden Wings' is blooming again since I pruned the dogwood, which was blocking her sun, waaaaay back.

HeleniumOrange

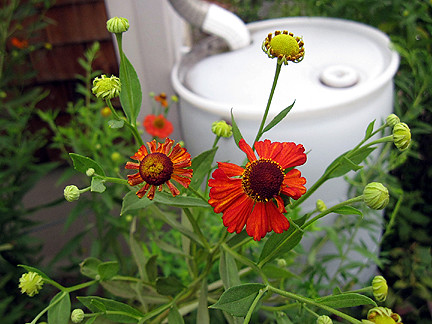
Even though I cut my sneezeweed back over a foot in early July, it's blooming now. 'Mardi Gras' has long since finished, and now it's time for 'Moerheim Beauty'...

HeleniumNative

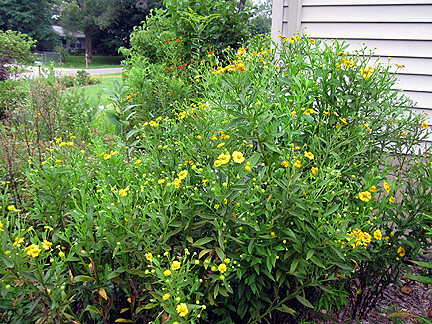
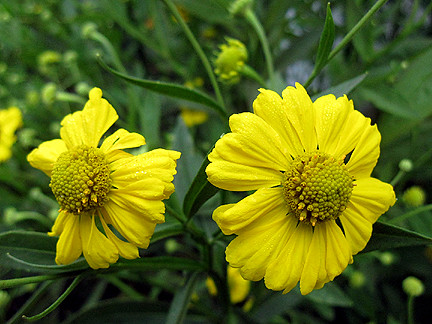
...and the native yellow Helenium autumnale. It's tall and makes a great screen for one of my rain barrels. (See how you can't see it?)

HeleniumNativeClose

I just love it close up.

dahliaBees

Bees love my dahlia 'Bonne Esperance.'

Kuri081410

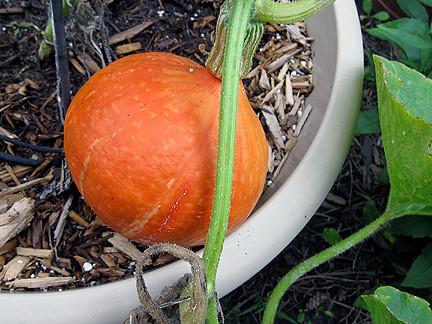
I'd say my one (and only) 'Uchiki Kuri' squash is ready.

ironweed080910

The ironweed (Vernonia missurica) outside my front door is a good six feet tall. I've read it likes it wet, though I never water mine. I also read it can spread, but mine hasn't (though it is true I collect its seeds).

ironweedClose

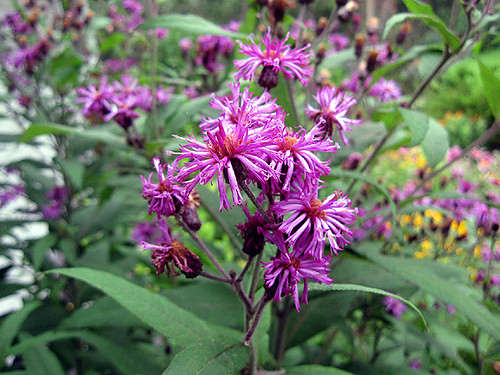
I love its vibrant purple flowers.

And that's about it for today. It's too humid and there are too many mosquitos. Let's go in and have some zucchini bread and lemonade.

* I'm marking native plants in this post by also giving their Latin name. (No Latin name = not a native plant.)

** Bizi is Fiona's nickname; Jimi is James' nickname. People often mention "all your cats" and as much as I'd love to be a crazy cat lady, I have just those two. It hit me that perhaps the nicknames were interpreted as individuals, esp. as Bizi isn't so obviously derived from Fiona.

Thanks to Carol of May Dreams Gardens for hosting Garden Bloggers' Bloom Day.